
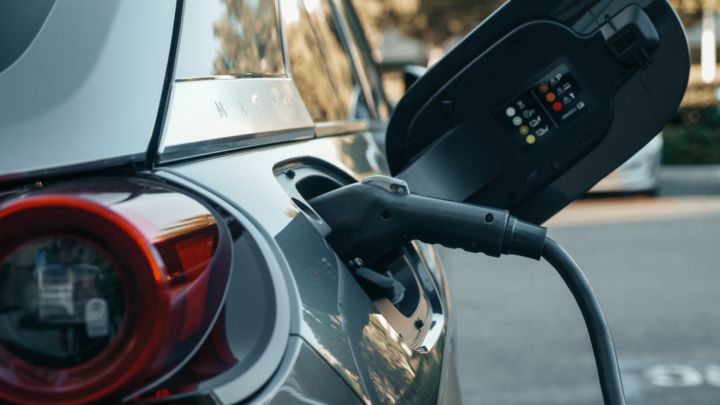
Electric vehicles (EVs) are becoming more popular, and if you’re one of the many Australians making the switch, you’re likely considering an EV charger for your home. Installing a home EV charger is a convenient way to keep your car charged and ready to go without relying on public stations. But where do you even begin with installation?
This step-by-step guide will walk you through everything you need to know to get your EV charger set up at home.
Step 1: Understand Your Charging Needs
Before jumping into EV charger installation, it’s crucial to assess what kind of charger you need for your EV. Not all chargers are created equal, and the type you choose will impact the speed at which your car charges.
- Level 1 Charger – These are the standard chargers that come with most EVs and can plug into a regular household socket. They’re slow, taking around 20 hours for a full charge, but work for those with low daily mileage.
- Level 2 Charger – This is the most popular choice for home installations. It requires a dedicated circuit and charges much faster, typically taking 4 to 6 hours for a full charge. If you drive regularly or want faster charging, this is the better option.
- Level 3 Charger – Also known as a DC fast charger, these are generally not available for home use. They require substantial power and are typically found at public charging stations.
Once you know which type of charger fits your lifestyle, you’re ready to move on to the next step.
Step 2: Check Your Home’s Electrical Capacity
Installing a Level 2 charger requires more electrical capacity than a standard outlet provides. You’ll need to check whether your home’s electrical system can handle the load. In most cases, homes built recently or that have been upgraded should be able to handle the extra load.
However, older homes might require an electrical panel upgrade. This can be done by a licensed electrician who will assess your existing capacity and advise on any necessary updates. If your home’s panel is already maxed out, trying to install a new circuit without an upgrade can lead to safety issues like electrical overload.
Step 3: Choose the Right Location
Where should you install your EV charger? You’ll want to pick a spot that’s convenient for both your car and your home’s electrical system. Most homeowners install the charger in their garage or carport, but if that’s not possible, outdoor installation is also an option.
- Garage or Carport – The most common place for installation, as it offers protection from the elements and easy access to your car.
- Driveway – If you don’t have a garage or carport, consider mounting the charger on an exterior wall near where you park.
- Weatherproof Considerations – If you’re installing outdoors, make sure the charger is weatherproof and installed to withstand rain, wind, and temperature changes.
Wherever you choose, ensure the charger is close enough to reach your car’s charging port with minimal hassle.
Step 4: Hire a Qualified Electrician
While you can technically plug in a Level 1 charger yourself, the installation of Level 2 Residential EV Charging Solutions require a professional electrician. This is not a job to DIY. A licensed electrician will ensure the installation is safe and compliant with local codes.
Here’s what they will typically do:
- Install a new dedicated circuit for your charger.
- Run the appropriate wiring to the installation location.
- Mount the charger securely.
- Test the system to make sure everything is functioning properly.
Hiring a qualified electrician also ensures that any necessary permits are pulled and that the installation meets all safety requirements. It might feel like an added step, but this ensures everything is up to code and avoids potential issues down the line.
Step 5: Install the EV Charger
Once the electrical work is done, it’s time for the actual charger installation. Your electrician will take care of most of this process, including mounting the charger and connecting it to your home’s electrical system.
They will also test the unit to ensure it’s working as expected, making sure it communicates correctly with your EV and charges properly. Most chargers come with a user manual, but your electrician should give you a rundown on how to use it, monitor charging, and troubleshoot any minor issues.
Step 6: Register for Any Government Rebates or Incentives
Australia offers various incentives to encourage EV adoption, and this can include rebates or tax breaks for installing home chargers. Before you start the installation, it’s worth checking what’s available in your state or territory.
These incentives could help cover a portion of the installation costs, making the transition to electric driving more affordable. Keep an eye out for state-specific programs and any updates to federal initiatives that support clean energy.
Step 7: Set Up Your Charging Routine
With your EV charger installed, you’re ready to start charging your vehicle at home. Most chargers come with smart features that allow you to set charging times, monitor energy usage, and even control the charger remotely from your smartphone.
If you’re on a time-of-use electricity plan, you might want to set your charger to start during off-peak hours to save on energy costs. By optimising your charging habits, you can keep costs low and always have your car ready for the road.
Wrapping Up
Installing an EV charger at home might seem like a big job, but with the right guidance and a professional electrician, it’s a straightforward process. By understanding your needs, choosing the right location, and following proper installation steps, you’ll have your EV charging at home in no time.